posted
We once brewed up a hot wire cutter using coppering pipe Piano wire, Car battery for power and a auto variac transformers to adjust the heat! it work awesome! if you need more assistance let me know!
-------------------- Steve Thomas Greer ABRACADABRA SIGNS & DESIGNS 102 Stanley St. Ayr, Ont. Canada Posts: 602 | From: Ayr, Ontario. Canada | Registered: Mar 2004
| IP: Logged |
I was going to borrow a scroll saw from someone to cut out some HDU letters this week...NOW I might just play around with rigging up a hot wire cutter.
Thinking...the heating wire out of an old toaster, Car battery hooked up to a battery charger, some kind of rheostat????? HMMMMMMMM.....
-------------------- Dave Grundy retired in Chelem,Yucatan,Mexico/Hensall,Ontario,Canada 1-519-262-3651 Canada 011-52-1-999-102-2923 Mexico cell 1-226-785-8957 Canada/Mexico home
posted
OK..Thanks for the tip guys..Back to the original plan!!!!
-------------------- Dave Grundy retired in Chelem,Yucatan,Mexico/Hensall,Ontario,Canada 1-519-262-3651 Canada 011-52-1-999-102-2923 Mexico cell 1-226-785-8957 Canada/Mexico home
posted
Sorry Barb and Pat, I guess I never knew that the Classified board linked an answer to this board, BTW is that done by copy paste or does it just appear on all the boards when mistakes are made?
I was also trying to find in the archives a post where the Hot Wire Cutter was featured as a how-to. I remember seeing it and couldn't figure out where it was, do you know?
-------------------- HotLines Joey Madden - pinstriping since 1952 'Perfection, its what I look for and what I live for'
posted
I built my own cutter using steel wire from the roof of the shop down to an electric fence handle with spring inside to tension, then insulators then proper cutting wire through a hole in the workbench and connected to a 12v supply.
It all worked pretty well....I then bought a huge bandsaw that can manage 12" thick material
So this was handcut
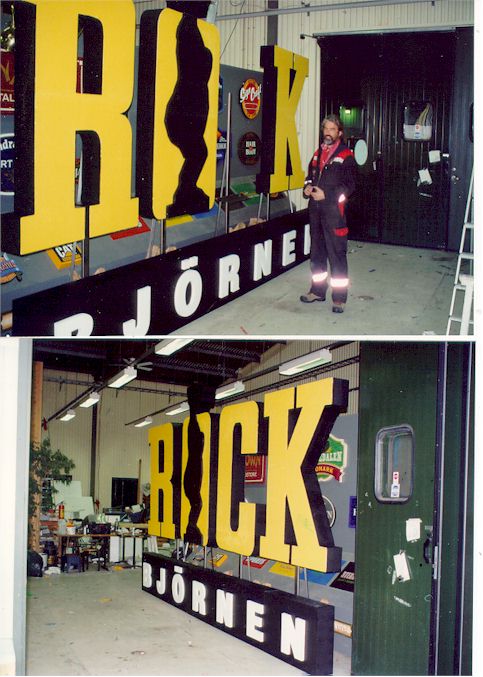
and here is the latest that is leaving the shop today its for a rock band here that are about to start a tour.
As the main US suppliers of HDU (ie larger sheets) have shown little willingness to venture over here, and the HDU that is available here is in smaller sheet sizes but far superior in quality and therefore more expensive, used mainly for prototype modelling in tooling and automobile industry...we have had to find other solutions to outdoor dimensional signage.
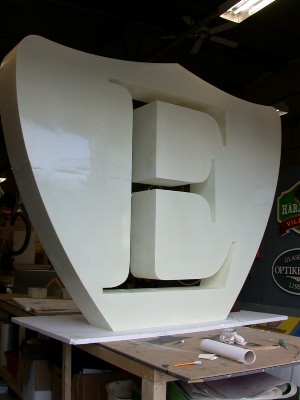
I am now routing standard eps polystyrene foam getting a really nice finish and coating it for outdoor use, after coating it can be painted with car paint, lettering enamel etc etc.
The customer see's no difference and the actual costs are much lower than HDU and you can have more fun experimenting.
WE have the added bonus that we have a large Styrofoam factory on the same industrial estate so you can order blocks in any size or density.
Newly coated but not finshed off before painting.
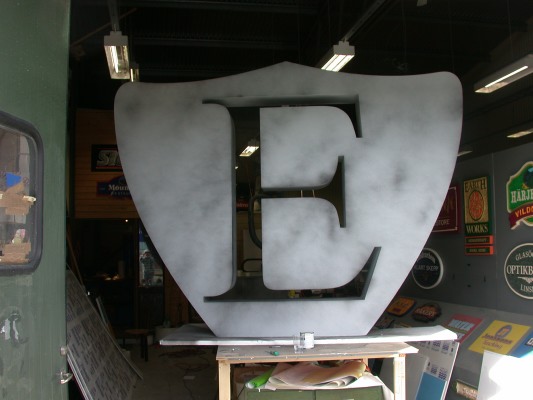
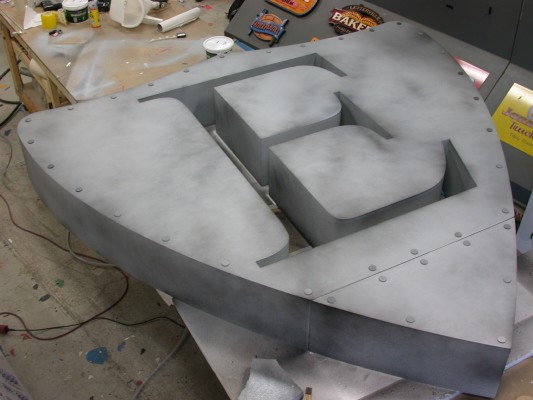
and nearly done
Its 8'x8' in size and 12" thick The bottom part is fitted with neodym magnets, behind thin steel plate so that when they slide it in and out of the truck for transport it rides better flat bottomed, and sizewise its doing 27 gigs.
edit: here's a link if you want to invest! or just a useful source for more info... www.croma-foamcutter.com
[ May 25, 2004, 03:54 AM: Message edited by: Henry Barker ]
After checking the price of hot-wire tables in a sign mag $800
I made my own outa scrap steel and a $25 12 volt battery charger from "Supercheap Autos"
I use ordininary fine steel wire. It burns out eventually but cheap and easy to replace.
I screw the "S" shape steel arm to one of my work benches, drill a hole thru the bench same diameter as the wire and another small "s" frame underneath the table. Clip on your battery charger (mine has variable ampage) and yer away laughing.
For tensioning ... I put a long Hex head srew thru the end of the top arm. It has a hole drilled thru the end of it to take the wire. Tension? Just screw the hex head out!
Another "trick" we use with Foam Letters ... we jigsaw the letters out of textured or "grain-printed" ply panels. Glue them to the foam and use that as a guide to cut out. All you have to do is paint the edges. Looks awsome, especially if you paint a shadow on the shop bulkhead after installing.
These were done on 3" foam.
Trick two!! Pounce a paper pattern on the wall to position letters.
Trick three!!! Put a small brad nail in the bulkhead inside each letter then push the foam onto it. It will hold the letter in place while the silicone sets.
[ May 25, 2004, 04:16 AM: Message edited by: Jon Butterworth ]


![[Confused]](confused.gif)


![[Eek!]](eek.gif)
![[Smile]](smile.gif)


 Printer-friendly view of this topic