|
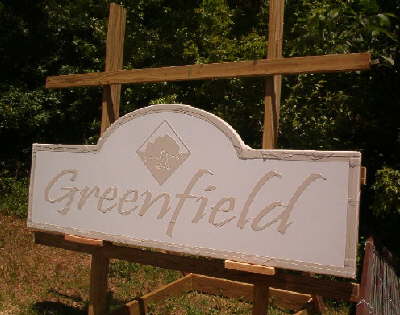
We start by
applying two coats of FSC88 waterbased primer. Wet-sand the next day. Let dry,
and spray two or three thin topcoats of acrylic latex. Let dry for 5 to 7 days,
depending on humidity. Apply the stencil.
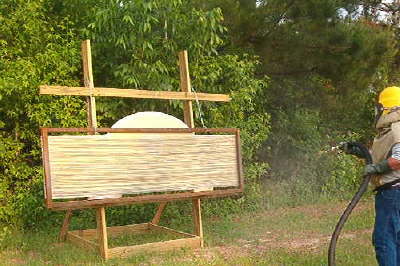
Blast the paint off at about 85 psi. Keep the nozzle moving quickly. Blasting
generates heat: heat generated by the compressor, heat from friction as the sand
particles collide with each other, the hose, the nozzle, and the substrate. The
longer the blast lingers in one place, the more heat builds up there. This will
damage the stencil and the paint under the edges of the stencil. If the stencil
is starting to turn darker, you are moving too slow. Move back and forth like
search patterns, mowing the grass, or plowing a field (ever done that?). If the
paint doesn't bust off yet, don't worry about it. Just keep moving. As the paint
begins to disintegrate, it begins to do so in patches. Move someplace else but
start to use circular patterns now, hitting the stubborn areas. Keep the nozzle
moving, hitting each stubborn area and quickly moving to the next one. You are
giving each area time to cool. Cool paint is brittle, hot paint is soft,
rubbery, and the sand has a tendency to bounce off instead of immediately
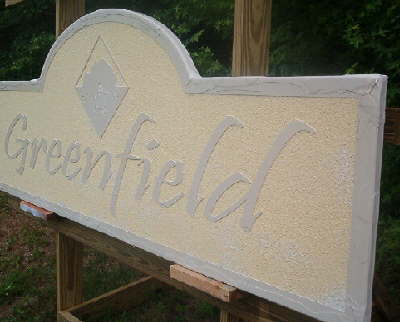
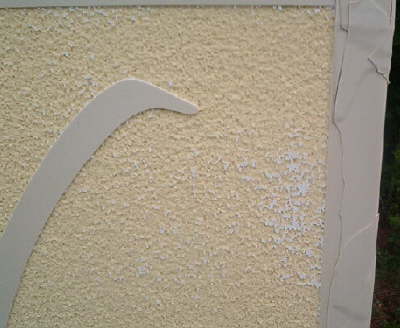
cracking and disintegrating it. The paint is now blasted away leaving an even,
grainy surface with no depressions. It is only blasted about 1/16'' deep. The
key is to keep skipping around to those stubborn areas, letting them cool, and
coming back to them again, and again. This only took a few minutes and, as you
can see, the stencil has not darkened.
The white specs are, of course the last remnants of paint. A couple of quick
shots from the blaster and they were gone. Now you are ready to blast through
the wires.
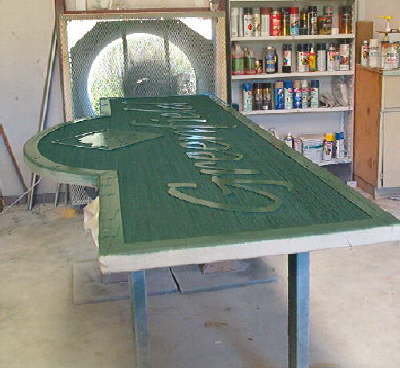
After 10 to 12 passes of blasting through a grain frame, the sign is air-hosed
off and then sprayed with two coats of solid color stain with an HVLP gun. The
stencil is left on until the last coat just begins to haze over.
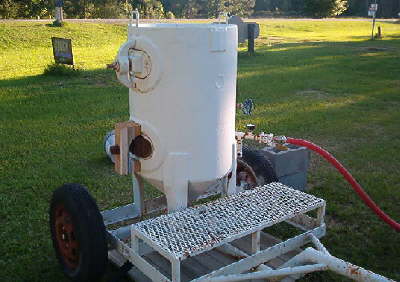
600# pot with redneck port closure sealed with a sandblast-stencil-gasket (it
only looks dangerous)
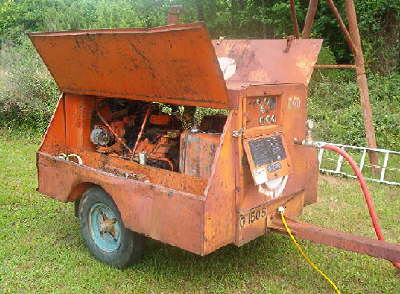
Redneck compressor...looks pretty sad but hey...it was 300bucks ...and a
starter, and a fuel pump, rebuilt the carburetor, added a lawnmower throttle
control and...
Redneck with redneck homemade grain frame.
A previous job of 80 square feet, took 1600# of sand using an 80# pot and the
shop compressor. The above job, 4 signs totaling 96 square feet, took only 1050
lbs of sand, 10 gallons of fuel, and 3 gallons of hydraulic fluid....yeah the
redneck compressor leaks...but I can fix that!
|