|
Yes! is me the Gorilla
glue Guy., I had an opportunity of wrote this step by step, I’m not good at
typing neither in spelling so please don’t be hard on me. I hope you can
follow up along with me.
I have made up while is going about a winter project in my spare time
mastering the glue .I hope you find it of interest to you...
:
So here is my gorilla glue project...
For those who do not know what gorilla glue is. It is basically strong glue
used to sandwiched material like HDU. Cedar wood or MD etc...
For this tutorial, you will require the following:
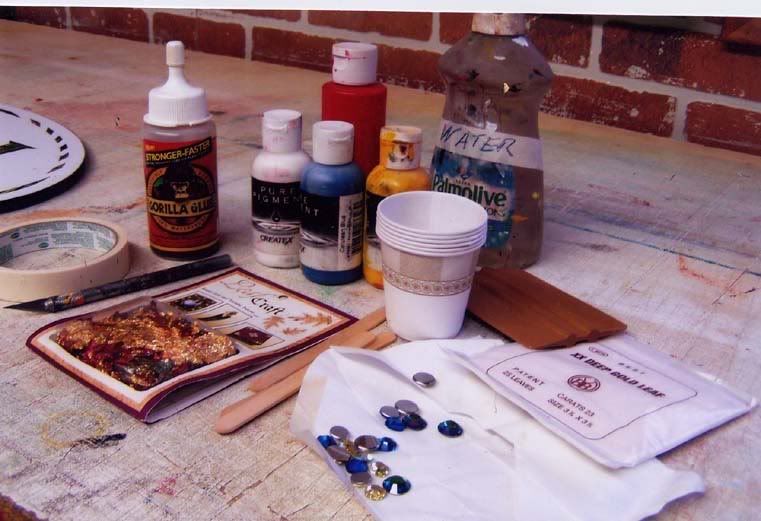
* Gorilla glue
* Small clean piece of wood/stick
* Scalpel / Xacto blade
* Paper cups (any container really, to mix the glue & water)
* Scraps of coroplastic.(1”W x 4” Long to apply the glue)
* Gold leaf (if you’re planning to gild or variegated leaf)
* Createx pure pigment (if you just want to give a color but not paint it)
* Transfer tape. (If you have you already have you design on your
computer you can use a cut paint mask)
* Latex Exam Glove
* some gems
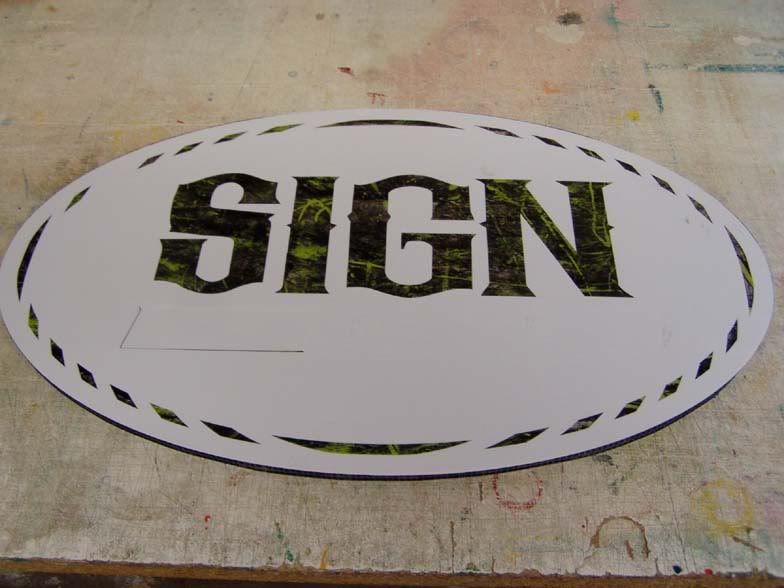
I decided to use a 12” x 20” Alumilite material for this sign.
I applied the Paint Mask with my layout cut out already I also cut out an
outline for my main Text so after apply the glue I will weed the outline so
that way the glue it will flow smooth and you won’t get any shape edges.
You notice that I already weed the (SIGN) Text. Once completed, I proceeded
to apply insides of the letters as this is the area which I will apply my
gorilla glue.
As you can see I cut out the small letters too , but I have not weed them
yet . One thing that I would like to mention, if you use paint mask or tape
usually what I do is cut the part of the letter in sections and apply the
glue on three or four letters so I can unmask the letter right after I
apply.
Mixing the Glue
now you are ready to mix the Gorilla glue.
Pour about 11/4 of an Oz. into a paper cup, along with three drops of water
and mix with a small clean piece of wood/stick until it turns a sort of
light mustard colour.
When doing small letters would usually only mix a small amount of glue due
to expeand so quickly.
[IMG]http://i16.ph
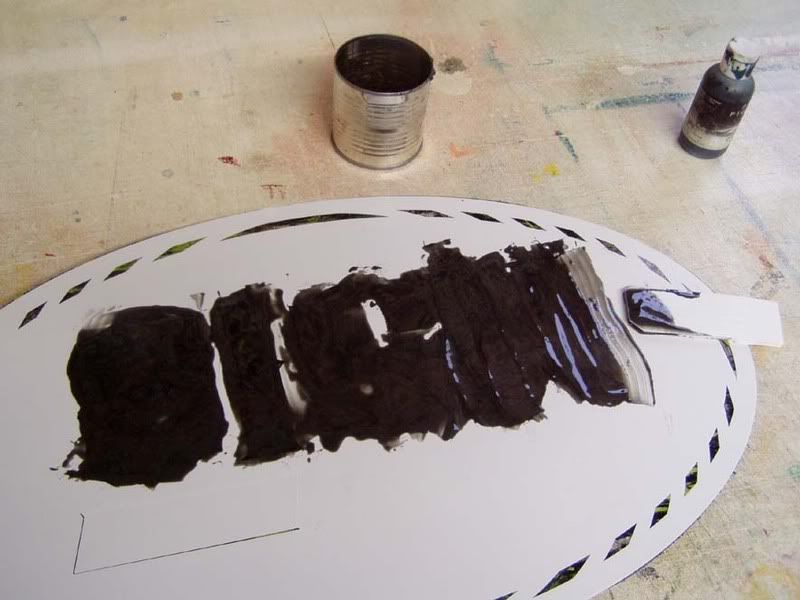
Applying the glue
Next, I prefer to apply the glue using a piece of 1” x 4” coreplastic
but you could also use a stiff brush if you wish , I like the coreplast
because you can apply evenly.
I apply the glue to the first letter, the glue is laid in the center as even
as possible in order to achieve good relief.
Once you have completed the 4 letter, go back and unmask the outline as
photo shows.
since this are 4” letter
I did apply the glue in one step, but if you are going to work with big
letter I will recommend to do one or two at the time so you can have a nice
finish Letters.
Do the same to the second letter and so on till you are finished.
Below is my panel with the gorilla glue applied on it. It does no look at
all nice, but not to worry... once you have removed all the paint mask it
will look very different.
Here I‘m putting some Gems on th middle of the letter while the glue still
tacky
IMG]http://i16.photobucket.com/albums/b8/signsbysal/FIVE.jpg[/IMG]
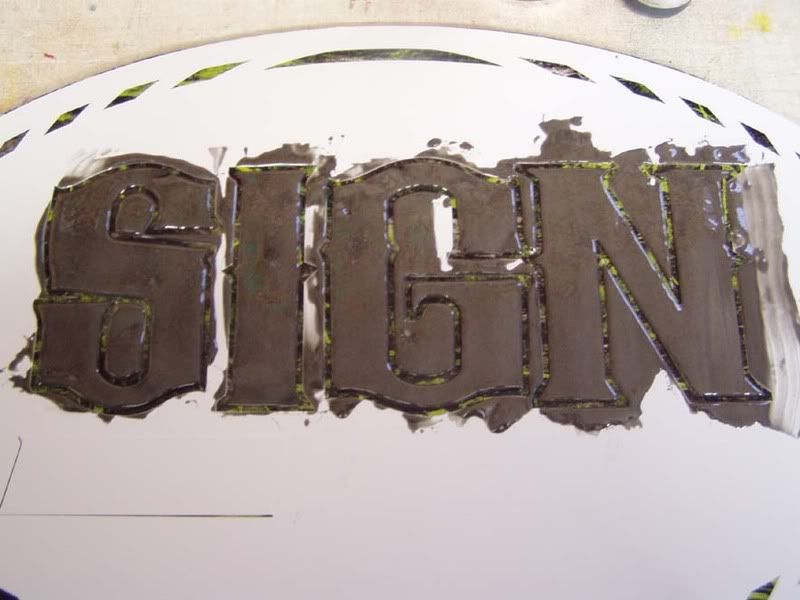
Gilding
once the entire mask has been removed, Allow the glue to settle for about 45
minutes or so, depending on the temperature in your work shop.
Periodically check if the glue has set and is a little tacky, once the tack
is right, you can proceed to apply your leaf.

You may find the glue is over expanding and appearing puffy, do not panic,
as you applying the
Leaf with your finger press the raised area gently down a little to level it
out & continue to apply your leaf.
Once gilding is complete, you may notice some of the letters are not really
straight were they should be. If this is the case, take a business card and
press the edge against the flats of the letters & try and straighten up the
letters edges.
The picture below shows the gilding process:
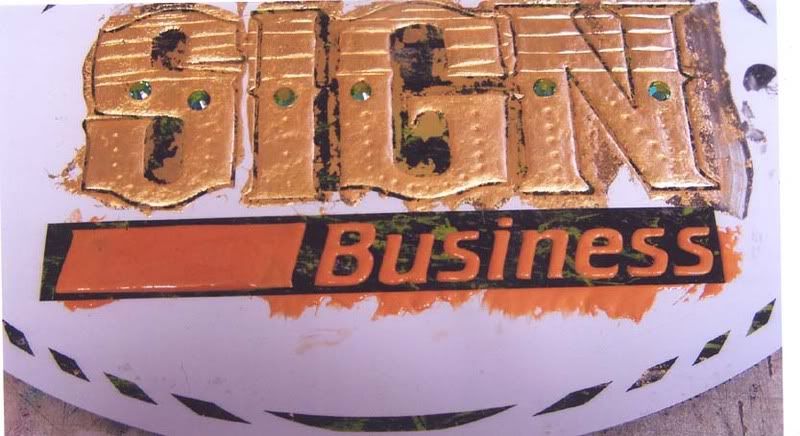
Business
I decided to use Createx paint insted of water and mix my Glue on the word
(Business).
To show the way it looks even I ‘m going to gild the letter Once they are
ready , proceeded to make up my mix similar to before. Although this time,
the ingredients are different.
The mix:
* Three drops of Pearlized from Createx
* one drops of water
Now I will pour this mix into a paper cup containing 1onz. Of gorilla Glue
Proceed to mix as before and once the glues consistency is right, I proceed
to apply it to my Letters.
Below is the completed gilded letters.
Below is a picture of the sign, but still has some parts to be added before
I decide it is complete.

IMG]http://i16.photobucket.com/albums/b8/signsbysal/nine.jpg[/IMG]
Here is the finished Panel and a close up.
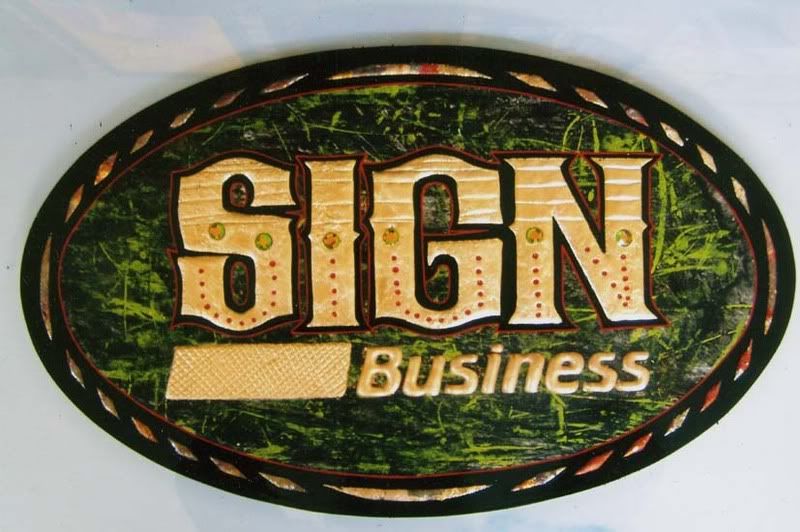
I hope that I put the pixs in order, I would not like to confuse anybody.
Like I said, this was just a short tutorial but I hope I have explained
things clearly enough for you to want to have a go yourself.
Enjoy, its fun!
Sal....
--------------------------------------------------------------------------------------------------------------
Sal Cabrera of
Signs By Sal is located in
New Freedom , PA
|
