Wood Graining Without
Sandblasting |
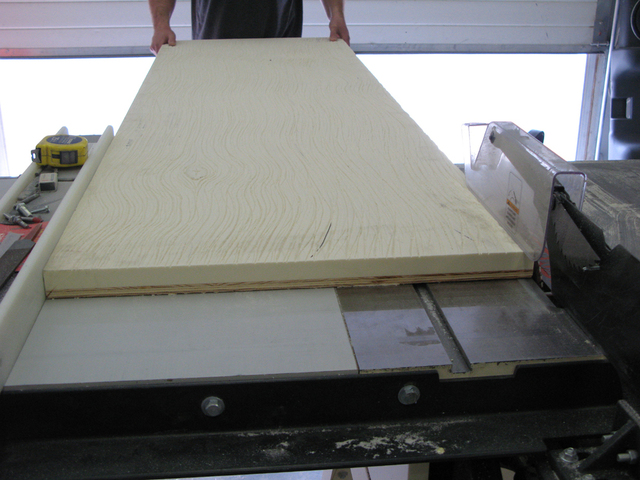
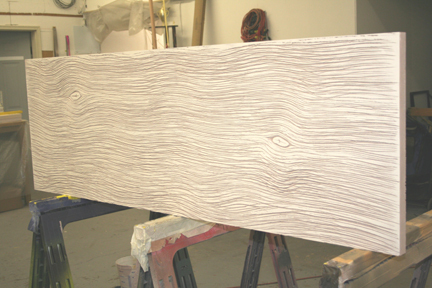
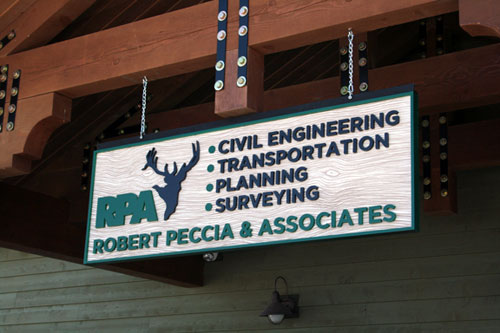
| This is a very basic dimensional piece with a
wood grain background requested by the architect. 2'x6' overall.
|
| Step 1:
Mist both the substrate and
PrecisionBoard with water.
|
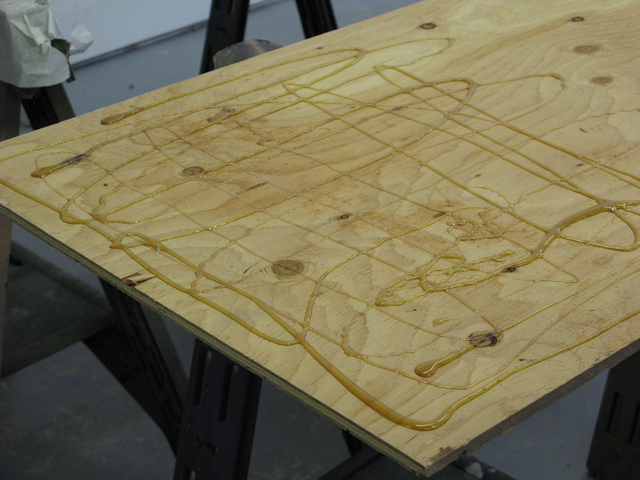
| Step2:
Apply
PB240 in a cross-hatch pattern on both substrate and
PrecisionBoard
|
|
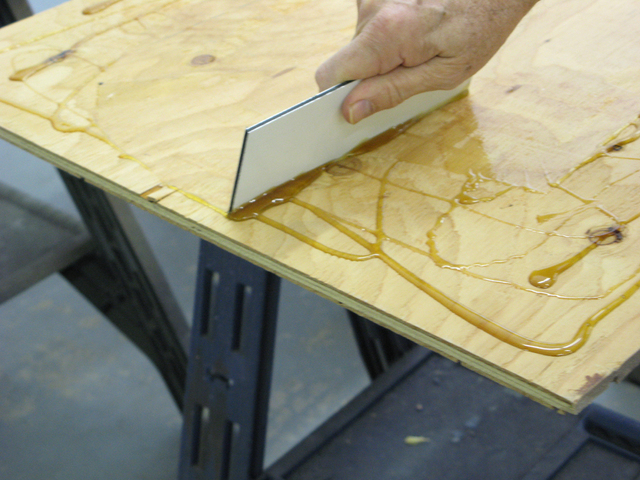
Steps 3 Use a piece of Dibond
or whatever to spread a thin coat all the way out to the edges.
|
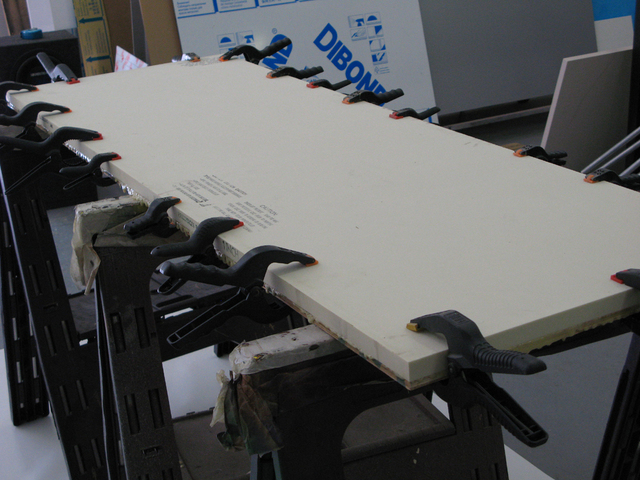
| Step 4:
Clamp tightly and make sure that you cover the floor under the sawhorses
with carrier paper. Clamp it well!
|
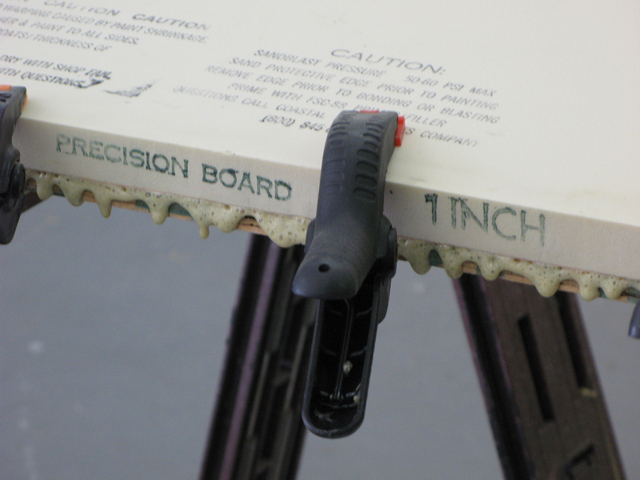
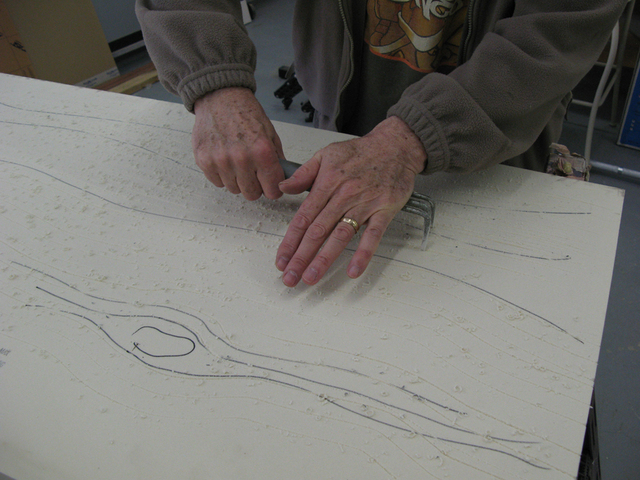
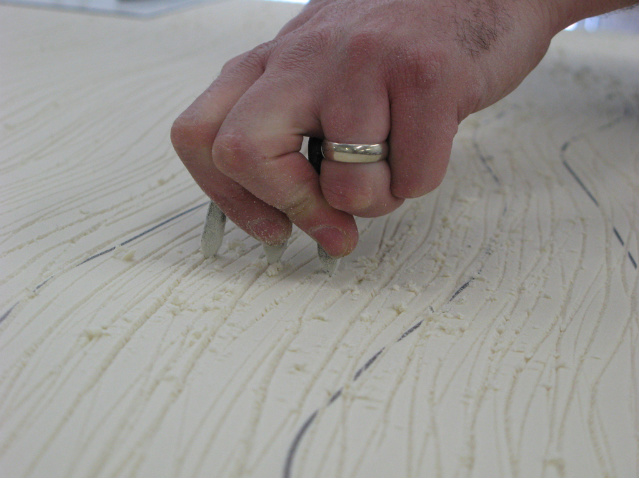
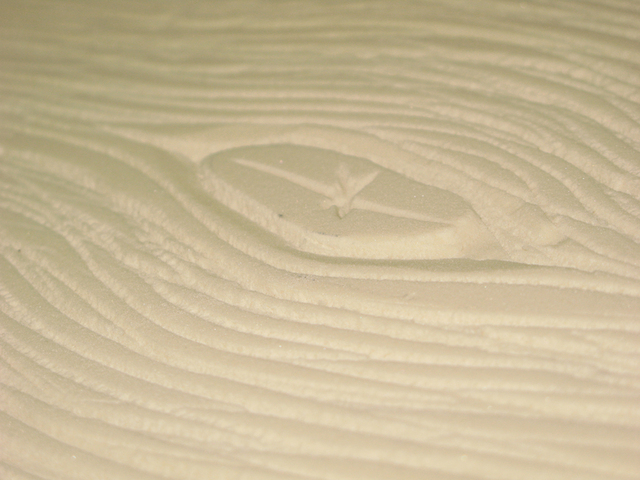
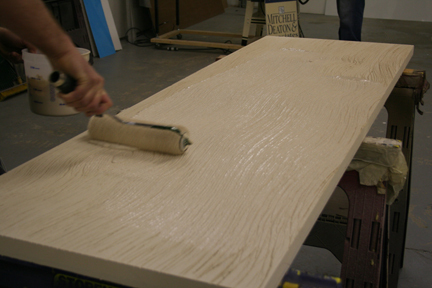
| Step 5:
Wood graining comes next. The only three tools you'll need unless you're creating knotholes, then you'll need to add a veining chisel. Keep a vacuum nearby. Don't sweep the particles.... Vacuum them! 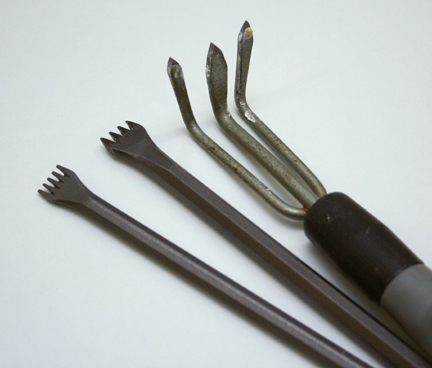 Hold the three tined venire as shown. This allows you to regulate down pressure on the tool. Always begin level, apply pressure, ease down into the PrecisionBoard and ease up the pressure at the end of the stroke. If you need a few marker guide lines, do it. We usually don't.
|
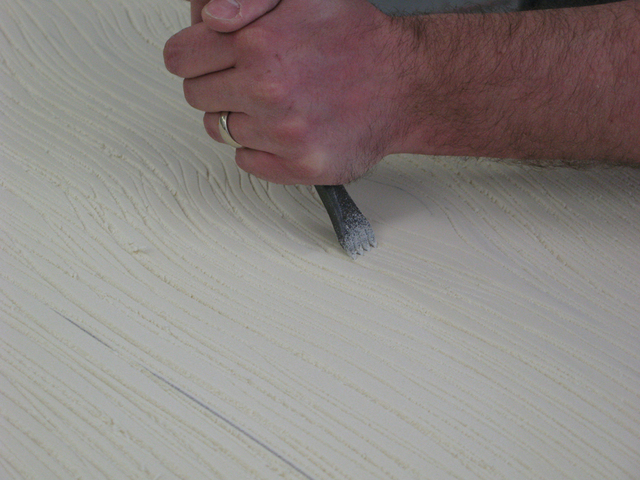
| Using the mid-sized stone carving tool, use both hands. One to hold, one to
apply pressure. Simple knotholes will come later. This tool makes the finer, more controllable lines.
|
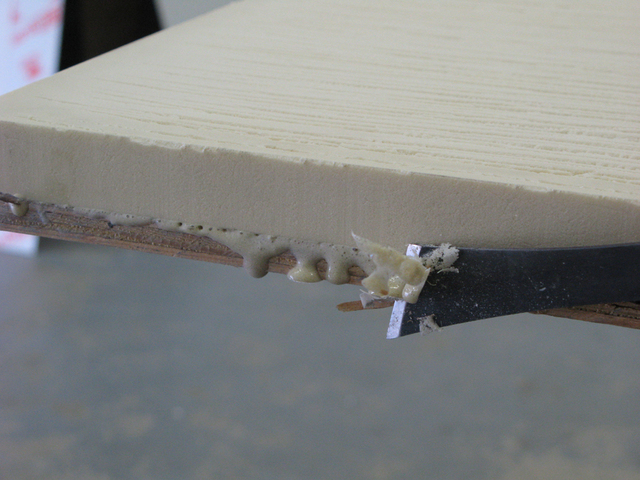
| Step
6:
Use a flat chisel to remove the
PB240 overflow from one edge.
|
The wood graining effect will become much stronger with the stain or paint
process. If you want a stronger, rougher effect, keep passing your veining
tools through the same veins you've already cut.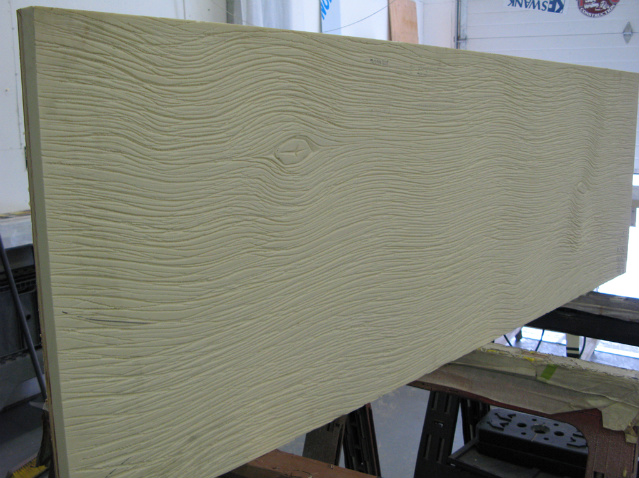 |
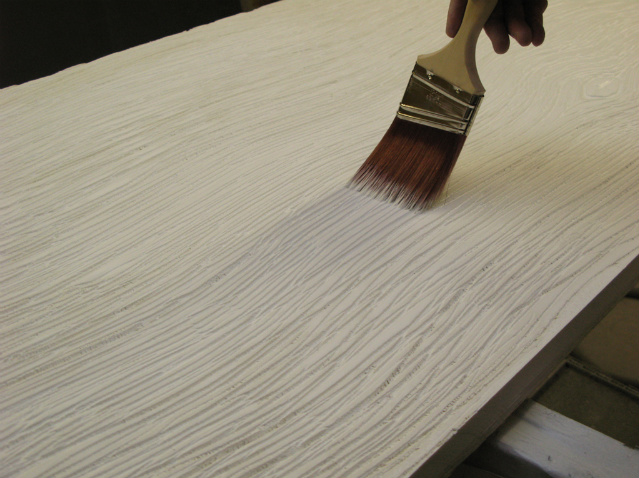
| Step
6:
Use a brush to prime if it's to be painted. If it's to be stained, DO NOT
PRIME the face, just the sides and back. If your shop has no air flow or
evacuation system, do NOT use oil based paints or stains.
|
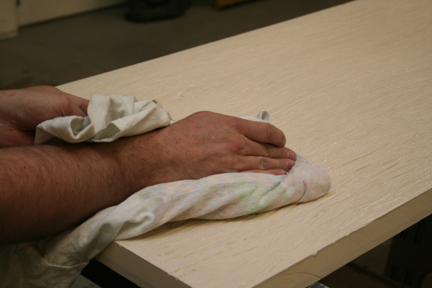
| Step
7:
With the primer cured and the top coat color selected and cured, (in this
case, a light beige) we now apply the slightly darker grain color. The paint
is mixed very thin so it flows into the grain and remains wet long enough to
wipe the slightly darker color from the surface.
Pour
Wipe quickly with wet rags
|
| Step
8:
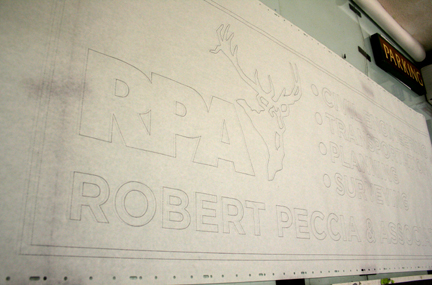
Pattern and dimensional copy application is next. Make an ink pattern in real size.
|
| Step
9:
Drill through the entire panel. Flip the panel over and counter sink for the screw heads. We don't want screw heads protruding above the level of the wood. |
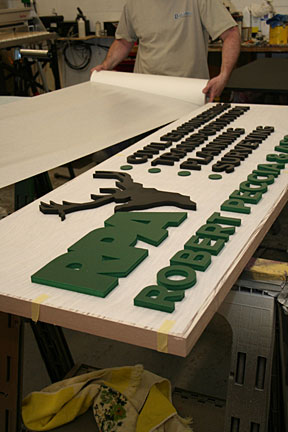
| Step
10:
Next, we'll be positioning and installing the
copy....... just a bit later this morning. Next, lay your pattern face up on the PrecisionBoard, carefully position each character in place, (use a bit of rubber cement in you have to) 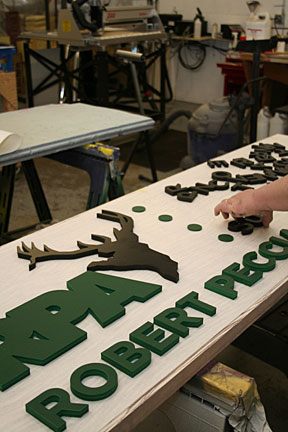 |
Carefully, premask entire copy...Two of
you, count three and set it straight down, releasing simultaneously so as
not to disturb copy position. Gently (with your fingertips) push premask down on the surface of each character. Gently! Don't shift the characters. 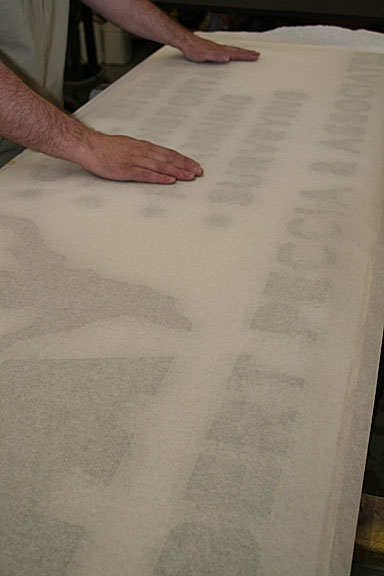
Now squeegee the characters tightly. |
Step
11:Flip the whole works face down on the
PrecisionBoard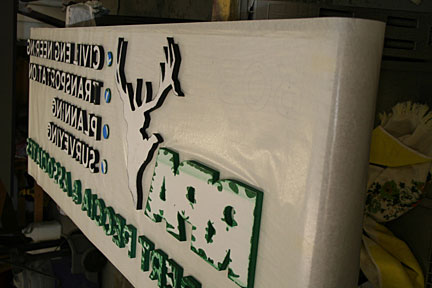 |
Use VHB or a "small" dot of
PB240 on the back of each character.. less
PB240
is better.... VHB is less messy and faster.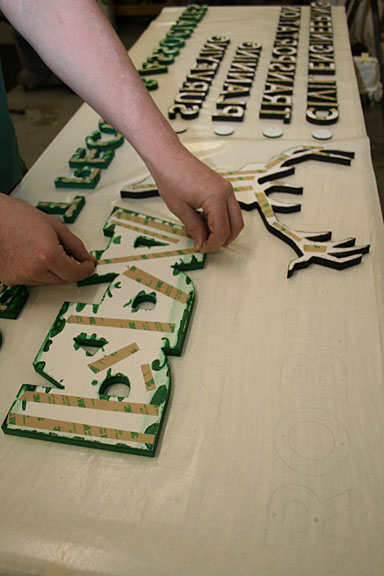 |
| Remove the cover line from the VHB, turn the
whole thing right side up on the wood grained surface, push down on the copy
to seat it, run the screws through the back into the sintra copy... The VHB
or
PB240 simply holds it in place while you run the screws. If you use
PB240
leave it to cure overnight.
|
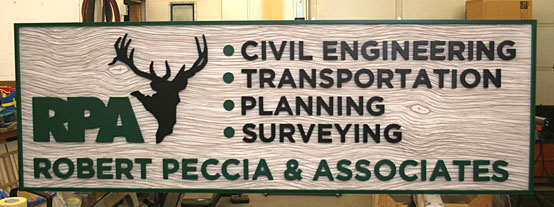 Florescent lights, so the true color doesn't show here. This is a piece that anyone can do without having specialized equipment. After wood graining if you don't want to cut out the letters you can simply use letters premade from Gemini and install them as shown. |
| Step
12:
With the steel, this is actually a rather heavy one, so.....How are
we going to safely hang it? Its important that whatever hanging mechanism you use be centered in the carving. In this case we used full length angle steel. 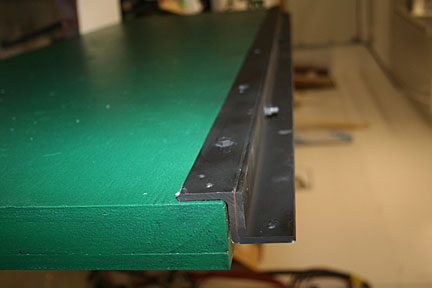 Relatively quick, uncomplicated, no sandblasting and minimal equipment required. The perfect method to add to the vinyl jockey's portfolio.
|
 Pierre St Marie, along with his better half Lynn, and children, Latigo, Liz & Rosemary operate St. Marie Graphics in Kalispell, MT |


|
[ Letterville | Join Us! | Bulletin Board | Events | Find A Letterhead | Profiles | Letterhead Merchants ]
Copyright © 2008 The Letterhead Website letterville.com