| Truck Graphics 101 By George Perkins |
| This step by step will
cover some basic 18 wheeler graphics. I stress the word basic here as these will be
produced using the most basic of techniques. This type of work makes up the bulk of my
business. If you can get with a truck dealer with any volume they will keep you quite
busy. Truck dealers are nothing like auto dealers either. No pressure, no rush, no suits,
my kind of folks. Pinstriping has been very popular on big rigs for about 15 years. International used ihand striping on a model called the Eagle starting in the seventies and it has taken off from there. Owner operators like to personalize their trucks. Many refer to the striping as tattoos. These truck jobs are an excellent place for those of you learning to stripe to try a few designs without commiting to striping the entire truck. List of materials needed
Along with these items, an eye for designs is helpful. Look in
car mags , the ones that cater to sport trucks are especially good. SignCraft and
Autographics have some nice stuff in every issue. I try to use a design which is sleek in
nature and not overpowering. Something with class that imparts a feeling of motion. Good
color use is probably the most important thing when doing these rigs. Use something
different to set your work apart from the rest. Take the most obvious choice and throw it
out the window. Be different. Look around for good color choices. Don't limit yourself to
vehicles either. Kids toys are great for interesting color combo's. Womens sweaters are
another. Color use is everywhere just take notice. Pastel colors work good as do hot
colors. I try and feel out the customer as to their preference. Check out the size of his
belt buckle for an indication of his tastes. Don't be suprised if you are dealing with a
women. Many ladies drive these rigs. I carry a color wheel with me for times when I get
truly stumped. |
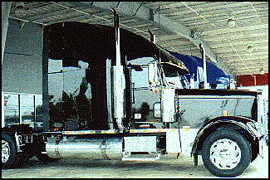 Fig. 1 Fig. 1 Here is our subject. A 1998 Freightliner Classic XL Raised Roof Sleeper Cost...$108,000 The first step and the most important step is the preparation. If it's dirty or covered with stack soot I'll start with a cleaning with a suitable all purpose cleaner like 409 or a spray glass cleaner. I'm lucky here as this one just came from the wash bay. I clean all the areas that are going to get the graphics or striping with Dupont 3812. This is a straight enamel reducer that I prefer to wax and grease removers. I follow this with a cleaning with some alcohol. In both instances I use a wet paper towel followed by a dry one.This catches some types of wax that removers wont . It also leaves the truck surface squeeky clean. Paper towels will scuff the surface slightly which helps adhesion. DO NOT skip these steps or it will come back to haunt you. DO NOT assume that because it is new there isn't any wax on it. The total cleaning time here was 7 minutes. |
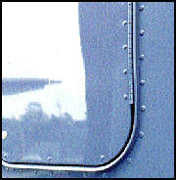 Fig. 2 Fig. 2 This is a type of hinge you will run accross on certain model trucks. Notice how it curves out and away. It's a real pain to tape over and should be avoided if possible. If you have to cross it do yourself a favor and go straight and not at an angle or on a curve. |
 Fig. 3 Fig. 3 Here I have started the design using 1/4" fine line tape. I try to use a straight line in the design which makes it easy to duplicate on the other side. Most of my customers tell me to do whatever I feel will look best. This owner, however, picked this design off another truck I did earlier in the week. These designs go on the hood sides and also get repeated on the side of the sleeper cab. I keep all my tape and x-actos, paints and brushes, waste basket, everything I am going to use on an Inflite work cart. It follows me around the truck keeping everything I need at my fingertips. I work all four spots in order. Taping all four, painting all four etc. |
Fig. 4 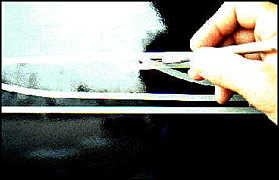 Here I am cutting the fine line tape where it overlaps into an area that will get painted. Be careful here! Use just enough pressure to cut the tape |
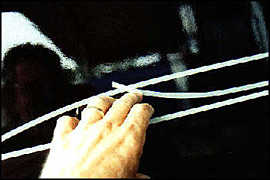 Fig. 5 Fig. 5Use your fingernail or a squeege to push down the area where the tape crosses over another piece of tape. Skip this step and you will get a little spike or bleed through that you will have to contend with later. |
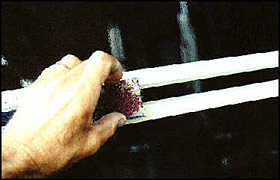 Fig. 6 Fig. 6Usually customers just turn me loose on these things. This guy not only picked the design he specified a color to go on it. Although it looks black in the pictures the truck is black cherry. A metallic black with a red pearl over it. A pretty color but not an easy one to work on. The customer wanted "a sort of pearl white". I try to figure what will go with a pearl white and black cherry and settle on reflex blue/process blue with blue green/ dark aqua. When in doubt about colors put a smaal dab on the truck to see how they look together. In this shot I am applying the reflex blue with a scouring pad. I start heavy and fade out twards the rear. This area can be closed in or open at the rear as this design is. Notice that the backside of the pad has been used already. Waste not want not. The same effect can be obtained with a texture roller. You can get some interesting effects here by laying down some fine line in different patterns before applying paint. |
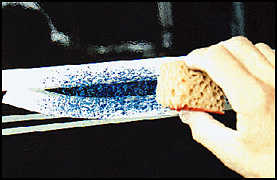 Fig.7 Fig.7Now get a sponge with a nice open pattern. Pick off any sharp corners so you wont leave a tell tale pattern. I apply the process blue to the front part of the area fading out as I go. |
Fig.8 Tape off the area that will be painted next. If it is next to the sponged area, as it is on this design, make sure you cover the sponged area completely or the tape will leave a mark that will show. Don't be afraid to tape over the wet sponged area. when you lift the paint it will stay stuck, and with the sponging you wont notice it has been taped over. Then apply the next color. In this case blue-green. I use a blitz fitch, I understand these are no longer available. Pick a brush that will put the paint on with minimal brush marks. Some folks like the foam brushes but I find you have to thin the paint too much. I always try to use as little reducer as possible. Penetrol is my choice. |
Now I take the plastic bag the fine line tape came in and wad it up and tape off one end. I mix up some aqua and blue-green and take the bag and dab this on the blue-green area. This takes a little care. You have to keep the bag wet with paint or it will try to pick up the base. Also turn the bag as you go so you don't leave the same pattern. As is the case with every step, I work all four panels, the two hood sides and the two sleeper sides at the same time. This trick is really helpful if you have a color that doesn't cover good, like rubine red. It covers the flaws. |
 Fig.10 Fig.10Now I mix up the owners requested "sort of pearl white " using white , silver and a little yellow. Real pearl could have been used but I didn't have any with me. Taking a 3/4 flat Grumbacher I fill in the final area. Notice how it is turned on it's side to get in the tiny area to the back of the design. |
 Fig.11 Fig.11Remove the tape, clean up any fingerprints or drips and spatters, and there will be some, especially on the tops of the fenders. There it is. If you are not going to do any pinstriping you are done. Time from starting including prep to this point 1 1/2 hours. Thats for all for spots on the truck. |
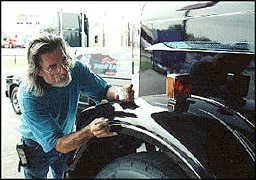 Fig.12 Fig.12Now comes the fun part. Break out that sword striper you have been practicing with and with the two main colors in the graphics lay down som pin stripes on the beast. I usually outline the fenders, put a design on the trailing edge of the fender , I do the doors, either under the window or down low, something on the upper sleeper, one on the dog house door, and one on the rear of the sleeper ( thats everybody's favorite spot.) I use a cosmos 700 for my striping. They are pretty stiff and as you can see I work outdoors a lot. I work with the paint prethinned and don't use a palette when striping these big rigs. I use a fully charged brush and do a flood stroke like you would use on a showcard. Palattes and ladders just don't get along. Total time on this truck was 2 hrs 5 min. This included taking the pics , a coke break, and talking to at least six potential customers. A simple job like this one sells for $300 . Most jobs I do are along these lines. Want more? Break out the airbrush and really get trick. Take and convex the stripes. The sky is the limit. |
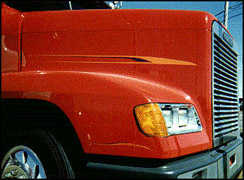 Fig.13 Fig.13Here is a real simple job with some simple pinstriping that anybody with a little practice can master. Put something similar on the doors and you can sneak up on selling your striping as your ability grows. |
 Fig.14 Fig.14Here's a different twist with a little more elaborate striping and some rivet dodging. |
| Well there you have it! As Dave
Draper would say "Go get em!" You will find this work WILL sell itself. My best
sales tool is a striped truck sitting on the lot. It leads to a lot of truck lettering as
well. They really like it when you carry over the colors and tricks in the graphics into
the lettering.
About The Author George Perkins is from Millington, Tennesse, where he owns and operates Perkins Signs & Graphics. George and his wife Terri, have one son, one stepson, and two stepdaughters. " I first got interested in lettering as a kid building model cars. As time went on I began lettering lettering street cars with shoe polish to go drag race in the early sixties, but it wasn't until 1972 that I really got serious about the trade." George continued to develop his talents over the next 5 years, working at it part time before landing a job at a small shop in Memphis that specialized in making small "For Sale" signs and paper banners.at it part time for five years. After a couple years of this, he moved on to a larger shop that did a lot of trucks along with lots and lots of walls, large construction signs with line after line of Helvetica. This was all BC.(Before Computers) Following a divorce in 1982, I went out on my own as a single parent. It was around this time that I started striping and specializing in race cars. I've always been involved with race cars . Drag cars in the sixties and dirt track cars since then. I drove a mini stock for four years winning 56 features. I've lettered over 1,500 race cars at this point. Mainly sprint cars. I've worked on just about all the WOO cars at some point. I used to stripe at the big ISCA indoor show in Memphis every year for about eight years. I quit doing the cars shows some years back and the race car work has almost completely gone vinyl. Six years ago I got a call from a truck dealer asking if I striped trucks. They were tired of the same old thing the guy they were using was doing. The big rigs have been my mainstay since. I added a computer and plotter two years ago and use it on about 20% of my jobs. goatwell@bigriver.net |
|
[ Home | Join Us! | Bulletin Board | Events | Find A Letterhead | Become A Resident | Letterville Merchants ] Copyright © 1998 The Letterhead Website |
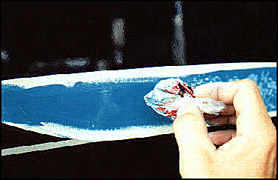 Fig.
9
Fig.
9