|
Here's
my step by step on doing with software what I used to do with
compass and straight edge.
To do this construction, you will need precise measurements of
the width of the sign, the shoulder height to the start of the
curve, and the height to the top middle of the sign. With these
three measurements, you can construct an accurate radius. You
are still doing this at your own risk because the other company
may have produced this with flat spots as Dale mentioned.
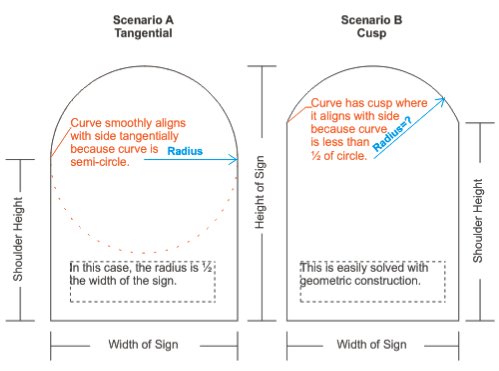
Below are two scenarios, assuming each one is a true arc. One is
actually a semi circle on top of the sign that ends tangentially
with the sides, the other is a section of circle with cusps
where it intersects the sides of the sign.
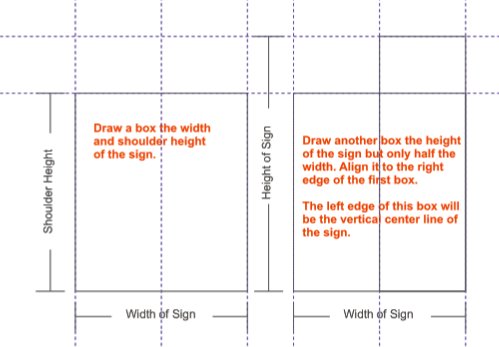
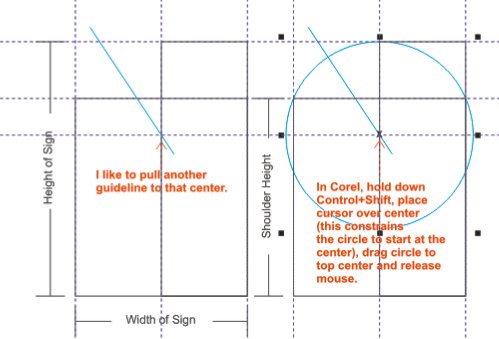
This is how I set up my workspace.

I draw two boxes in scale, one the size of the rectangular
portion of the sign, the other the total height of the sign but
half the width.
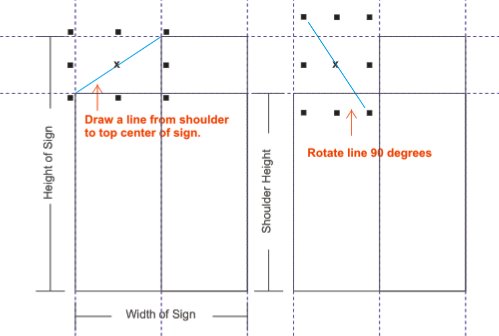
Draw a line and rotate it 90 degrees. Make sure it snaps exactly
at the shoulder and top center.
Drag the line larger until it intersects the center line of the
sign.
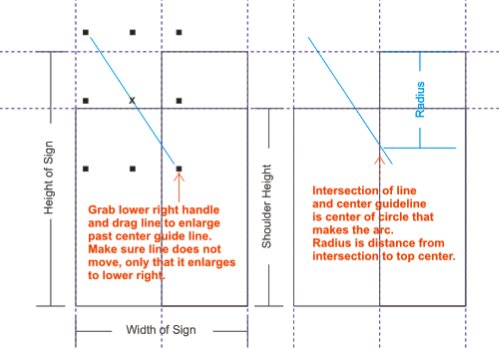
The intersection point is the center of the circle that will
make the arc section.
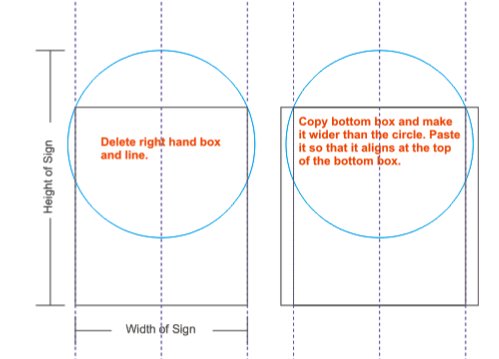
Start the editing process.
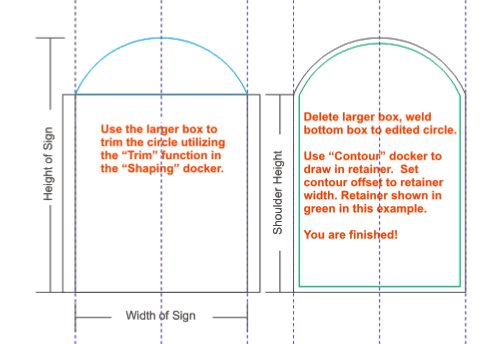
Finish trimming, welding, and adding the retainer contour.
I'd superimpose this over a minimally distorted photo of the
sign to check and see if there's any obvious anomalies. Also, on
installation, bring a router or laminate trimmer with a flush
cutting bit with a bearing on it. If the face is slightly large,
the router will trim it to match the can. Be sure to allow for
expansion clearance.
Even with measurements, it is necessary to generate some
computer files for production, permitting, etc. The steps above
will help to get things very close to actual and also to verify.
I've field measured numerous odd shaped faces for retrofit,
including many Granite ones. I'll set up my measurements similar
to what I show below.
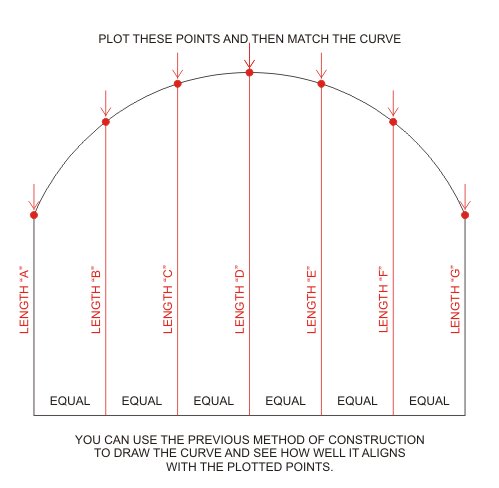
I'll plot the measurements in Corel and then generate a curve to
match.
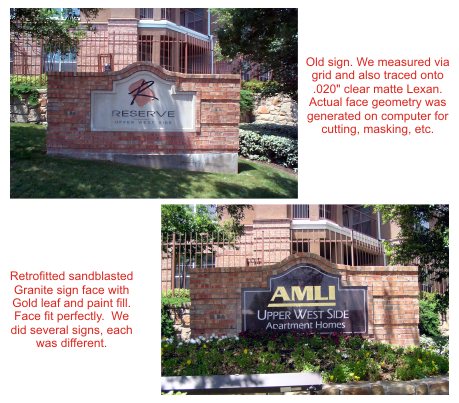
For really weird shapes, I have a piece of matte .020" clear
Lexan, approximately 4' x 10'. I'll hold that up against the
face and mark everything on it with a pencil. I then precisely
measure that clear template and plot it on the computer. When my
Lexan template is not being used, it gets rolled up and secured
with tape.
Following is a picture of a retrofit we did using measurements,
photos with minimal distortion, traced pattern on Lexan, and
computer generation.
|
