Creating The Bevel Effect In CorelDraw |
| There have been several requests lately
for information on creating “bevel look” or “prism” lettering that can
be cut in vinyl. I have been doing it for some time now and, although it is not a easy as
typing in the lettering and pressing the “prism” key, it is a fairly easy
process to master. I happen to use CorelDraw as my graphics program but I am sure that any of the signmaking programs will allow you to create the same effect. In the following illustrations, I have shown a full color version of each step so that you can see how each movement affects the appearance of the letter. To see a bigger photo of any of these steps, just click on the "thumbnail" images shown here. Use the Back button on your browzer to return to this article.  For purposes of this discussion I am using a simple
Helvetica letter H, but the same procedure allows you to create the same effect in any
letterstyle, as illustrated in the sample shown at left. For purposes of this discussion I am using a simple
Helvetica letter H, but the same procedure allows you to create the same effect in any
letterstyle, as illustrated in the sample shown at left.There
are a few things to keep in mind at all times. First, establish the direction of the
apparent light source and keep it in mind at all times. Second, when manipulating the
nodes or control points do not move any that are along the edges facing the apparent
light. Finally, be sure to convert all the nodes or control points on the letters being
manipulated to “cusp” (in other words make them so that when you move one node
it does not affect the one beside it. |
 Step 1: Type in your letter and
assign a dark color. Duplicate that letter, assign it a lighter color and align it
directly over the original letter. Convert ONLY the top letter to curves. Finally
“marquee select” all nodes on the top letter and change them to cusp. This will
prevent one node’s movement from affecting it’s neighbour. Note that the
original darker letter is left as text so that it cannot be inadvertantly moved or
changed. Step 1: Type in your letter and
assign a dark color. Duplicate that letter, assign it a lighter color and align it
directly over the original letter. Convert ONLY the top letter to curves. Finally
“marquee select” all nodes on the top letter and change them to cusp. This will
prevent one node’s movement from affecting it’s neighbour. Note that the
original darker letter is left as text so that it cannot be inadvertantly moved or
changed. |
 Step2: Add a node to the top
(lighter) letter as shown and drag it to it’s new location. ( If we were working with
a curved letter it would be necessary to change new node to cusp as mentioned above). Step2: Add a node to the top
(lighter) letter as shown and drag it to it’s new location. ( If we were working with
a curved letter it would be necessary to change new node to cusp as mentioned above). |
   Steps 3 thru 5: Continue adding and/or moving the nodes as shown. |
 Step 6: Now comes the
interesting part. Deciding where the lighter and darker parts of the lettering should
meet. We have added a node to the upper right arm of the letter and then moved it and the
node at the lower right of the horizontal stroke so that they meet. Step 6: Now comes the
interesting part. Deciding where the lighter and darker parts of the lettering should
meet. We have added a node to the upper right arm of the letter and then moved it and the
node at the lower right of the horizontal stroke so that they meet. |
 Step 7: The final step is adding
a node as shown and moving it to meet the middle of the vertical stroke. Step 7: The final step is adding
a node as shown and moving it to meet the middle of the vertical stroke. |
 Sample 2: Here
we see the finished letter and it’s two components. In the middle is the darker color
and on the right the lighter color. Both are now ready to be cut. Sample 2: Here
we see the finished letter and it’s two components. In the middle is the darker color
and on the right the lighter color. Both are now ready to be cut. |
| Once we have cut the two components it is
simply a matter of applying the darker color to the job and then applying the lighter
color over the darker. Everyone has their own preference for registering muliple layers
but I use a large window as a tracing table that allows me to see through both layers
after they are pre-masked. I register the two parts and tape them together to take to the
jobsite. As I mentioned at the beginning, this is not as easy as punching the “prism” key but after you do a few letters it becomes almost second nature and of course you can charge a lot higher price for the job to cover your added time! Good Luck!!! |
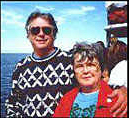 Dave Grundy, along with his better half Shirley Smith, and two cats,
operate Shirley's Vinyl Signs in
Granton, way out in the country just north of London Ontario. This photo shows them in
their favourite holiday destination, Barbados, where they hope to retire as soon as they
win the Lottery! When not making signs we enjoy sailing, golf, and avoiding Canadian
winter. Dave Grundy, along with his better half Shirley Smith, and two cats,
operate Shirley's Vinyl Signs in
Granton, way out in the country just north of London Ontario. This photo shows them in
their favourite holiday destination, Barbados, where they hope to retire as soon as they
win the Lottery! When not making signs we enjoy sailing, golf, and avoiding Canadian
winter.
[ Letterville | Join Us | Bulletin Board | Letterhead People | Merchants | More Step-By-Steps ] Copyright © 1998 The Letterhead Website |