 Barter Pays! Combining
Goldleaf & Airbush TechniquesBarter Pays! Combining
Goldleaf & Airbush Techniques
Barter Pays! Combining
Goldleaf & Airbush TechniquesBarter Pays! Combining
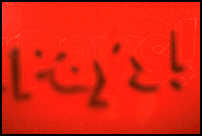
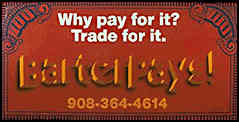
Goldleaf & Airbush TechniquesThis sign was painted on PVC board supplied by the customer. The background was to be red, so I coated the white board with red vinyl ink. The rest of the artwork was done with One-Shot. The customer wanted two different signs, both similar, but one with gold leaf lettering, and the other with just paint.
Since I don't have access to a plotter, I projected the type and hand-painted the lettering. The customer wanted a border to simulate money so I scanned a $100 bill into the computer and simplified the graphics for a corner design that wouldn't be too difficult to paint.

1) I projected the lettering and drew it out with a white Stabilo pencil. Next, I
shifted the main lettering over and down, and drew a drop shadow next to
the lettering.
2) The drop shadow forms the edge of the 3-D letter, so outside of
that, I airbrush a cast shadow with some thinned out black enamel. This
should be sprayed light enough that it doesn't become completely black. This shadow will
make the 3-D lettering more convincing.
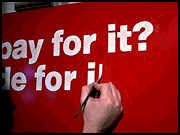
3) While the airbrushed paint is drying, I brush in the secondary copy. The copy at the
top is done in ivory, and the phone number is painted in orange.
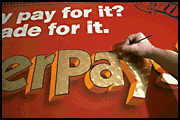
4) Next, I mix a couple of different shades of gold / brown for the edges of the main
copy. I paint the sides of the lettering with the lighter shade, stopping at a 45 degree
angle on the round strokes.
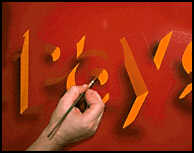
5) The darker shade is used for the bottom edges of the lettering. Where the lighter
shade meets the darker shade on the round strokes could be blended together with the
airbrush, but in this case I opted to paint a finger-joint blend for a more graphic
effect.
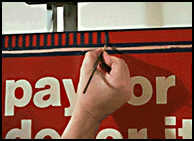
6) With the edges of the lettering done, I tape off the border of the sign with
fine-line tape. Since there are several evenly spaced lines around the edge of the sign,
the tape makes this process go quickly and produces more accurate results than freehand
lines.
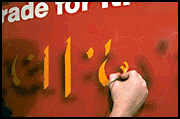
7) The straight lines are painted in dark blue, stopping where the lines meet the corner designs.
8) The tape separating the two outside lines is removed, and vertical lines are painted in between them freehand.
9) The rest of the tape is removed, and the corner designs are painted in. At this
point, both signs are complete except for the faces of the main copy.
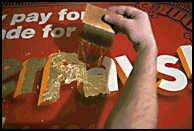
10) The first sign is to receive gold leaf lettering. Either loose leaf or patent leaf can be used. Here, loose leaf is being applied. I lettered the copy with quick sizing mixed with white One-Shot. Adding paint (sparingly) to the sizing helps to show that the sizing is being applied evenly and without voids. The gold is applied when the sizing is just slightly tacky.
A gilder's tip is used to transfer the leaf from the book to the surface of the sign. I apply a couple of drops of oil to my forearm, then the tip is charged by lightly brushing against the skin. A very small amount of oil is all it takes to lift the leaf from the book. If too much oil is used, the leaf won't let go from the tip.
 11) For purposes of this demonstration, I am applying a sheet of patent
leaf in this shot. Patent leaf is the same as loose leaf, except that it has been
lightly fixed to a sheet of rouged paper for easier handling. This is especially useful in
conditions where there is a breeze. The sheet is placed over the sizing and lightly rubbed
into place. Patent leaf uses a bit less leaf, since only the part that contacts the sizing
actually comes off the sheet, leaving the rest to be applied elsewhere.
11) For purposes of this demonstration, I am applying a sheet of patent
leaf in this shot. Patent leaf is the same as loose leaf, except that it has been
lightly fixed to a sheet of rouged paper for easier handling. This is especially useful in
conditions where there is a breeze. The sheet is placed over the sizing and lightly rubbed
into place. Patent leaf uses a bit less leaf, since only the part that contacts the sizing
actually comes off the sheet, leaving the rest to be applied elsewhere.

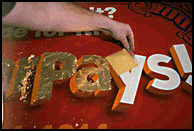
12) Next, the gold is burnished. Burnishing is the process of lightly rubbing the leaf to remove any loose pieces and to give an even finish. Usually a large wad of cotton is used for this. Care must be given not to rub too hard or to scratch the gold, as the sizing is still soft at this point.
13) For a more interesting burnish, a process called engine turning
can be used. Here, I have applied a piece of velvet over the end of a film canister. This
is pressed lightly against the gold, and turned a half turn at even intervals. This
process leaves microscopic circular grooves in the gold that catch the light in an
interesting pattern, giving more depth to the lettering.
 14) After the excess gold is dusted off, a black outline finishes off the
lettering.
14) After the excess gold is dusted off, a black outline finishes off the
lettering.
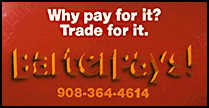
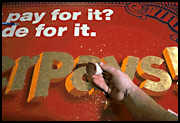
 15) On the second sign, I painted the lettering with a gold color lighter
than the edges. I airbrushed a little orange into the top of the lettering for a slightly
metallic effect. By staying back from the edges a bit, no masking was necessary.
15) On the second sign, I painted the lettering with a gold color lighter
than the edges. I airbrushed a little orange into the top of the lettering for a slightly
metallic effect. By staying back from the edges a bit, no masking was necessary.
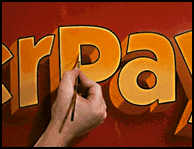 16) I came back with some of the original lettering color to sharpen up the
edges around the airbrushing.
16) I came back with some of the original lettering color to sharpen up the
edges around the airbrushing.
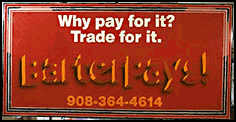
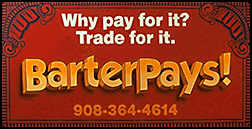 17) The finished airbrush sign.
Subscribe To Airbrush Magazine Today!
Click on the link above or Phone: 1-800-537-5419 | 487-423-2168