 Airbrushed Logo on a Truck By Bill Jonas
This is the process used to produce a simple, 3-D-looking logo on a truck door. I used masking for two reasons: one, to reduce the layout and painting time and, two, also because the masking could be cut off the truck while the other paint was drying. I began with a pounce pattern because the job involved more than one layer of masking on more than one door (and even more than one truck). Working from a nice, accurate pounce pattern helps keep things consistent.
|
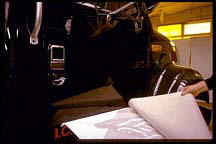
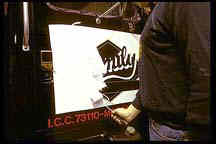
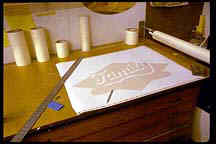 1. Begin by cutting the masking material for the black. Because the truck is black anything covered by this mask will remain black when the masking is removed. I am using masking material from a vinyl plotter. |
 2.
The mask is laminated with transfer tape to keep everything registered while it is being
transferred to the truck door. The low-tack transfer tape is squeegeed onto the masking
material to ensure good adhesion. |
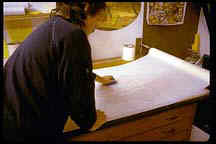
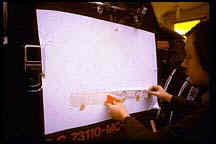
 3. After thoroughly cleaning and degreasing the door,
measure the masking and put it into place. Run a strip of masking tape along the bottom to
serve as a hinge that will facilitate the next step. |
 4. The masking material is mounted on a silicone-treated release sheet that must be removed so the masking can adhere to he truck. The masking tape hinge maintains the registration while this is being done. |
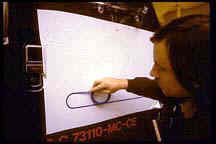
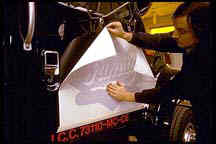 5. Working from the bottom, smooth the masking into place to avoid any wrinkles or bubbles. |
 6. Use a squeegee to ensure positive contact between the masking and the truck surface. Squeegee in one direction to force out any trapped air. |
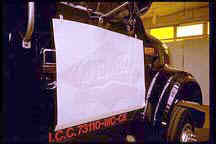
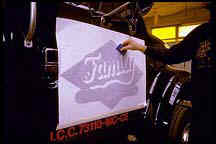
 7. The transer tape is now removed, and the stencil is in place. |
 8. The black linework within the logo is laid out with green, fine-line tape. I also add a tape line around the outside of the logo to serve as a varnish line when I clear-coat the finished design. Use a wider tape for this and place it on the masking, allowing it to overlap onto the logo by about 1/10 of an inch. |
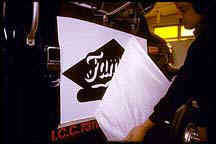
 9. Using white lettering enamel for good coverage, block out the entire area with a short-nap roller. At this point, both doors are masked, painted white and allowed to dry while the other masking is being cut along with the other lettering on the truck. |
 10. The next mask is for the white lettering. The logo is scanned into the computer, then masking is cut on a plotter that cuts vinyl. The vinyl masking is registered in place over the white background to show the placement, then apply the lettering. |
 11. Even though the computer will cut all of the pieces of masking, be alert to situations where it is easier or faster to add an effect on the spot with tape or frisket, or even paper. In this case, a white line around the smaller panel is taped out using blue fine-line tape, which is very flexible for making tight curves. |
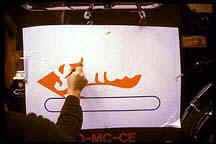 12. With the masking in place, block in the background color with a large lettering brush. The lettering enamel is only slightly thinned to ensure good coverage with a minimum of bleeding under the masking. |
 13. A second color may be added to the background because tape lines are separating the colors (see step 8). These thin tape lines allow for laying in both colors at once and also provide a thin black breaker line in the finished design. |
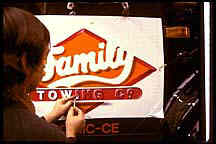
 14. While the background paint is still wet, the shadows are airbrushed behind the lettering with thinned black enamel. A shadow is also sprayed under the small panel, plus some shading to the outer frame. |
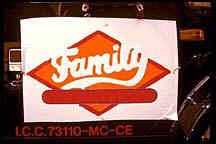
 15. A white highlight is airbrushed on the smaller lettering to give it the embossed eflect. Airbrushing is much faster and even more convincing than brush work for shadows and highlights such as these. |
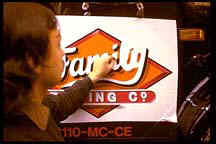
 16. Now the second layer of masking can be removed, which reveals the white lettering underneath. |
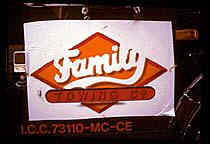
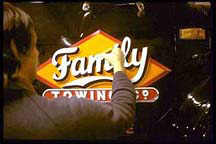
 17. As the first layer of masking is removed, the black shadow and linework are revealed. When the airbrushing is dry, roll on a coat of clear to help protect the airbrushing. The thin black outline around the outside of the design allows the clear to run over the design edge providing more protection. |
 18. Once the clear coating begins to tack, the masking is removed. Try to use a clear that dries fairly fast. |
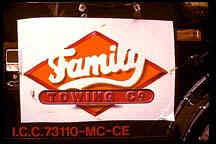
 19. Some pale gray is used to add a convex effect to the lettering. A few light blue highlights are added to the block shadow on the script. |
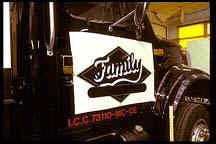
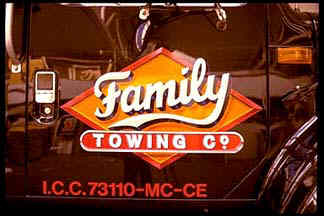 20. The finished logo. |
Subscribe To Airbrush Magazine Today! Click on the link above or Phone: 1-800-537-5419 | 487-423-2168 |